
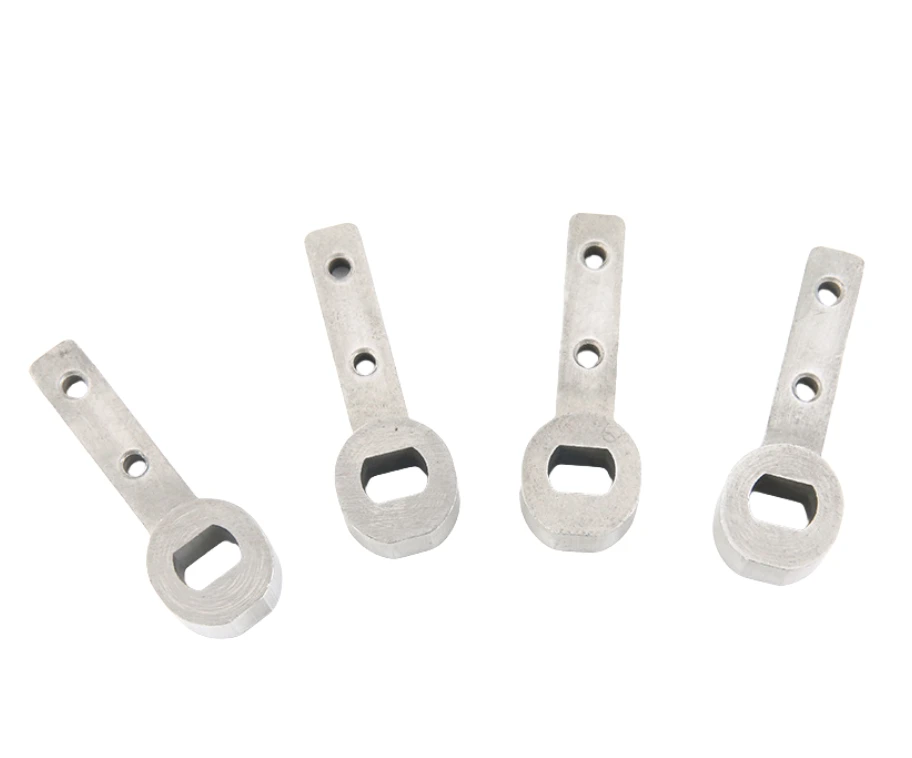
What connecting levers transfer between lock mechanism parts
Review this component together with its mating parts and delivered condition. The interfaces below define the drawing information needed to assess forming, finishing and inspection.
The reference shows elongated forms with connection holes or shaped openings.
Hole spacing, opening geometry and mechanism-datum interfaces
Specify hole spacing, opening geometry and the contact profile relative to the mechanism datums.
Include the load direction and travel limits.
Why prioritize connection spacing over the lever outline?
The linkage acts through its connections, not through an arbitrary exterior dimension.
Defining those centers and working contacts establishes how motion is transferred.
The surrounding outline can then be controlled according to clearance and appearance rather than assumed to be the main datum.
Forming versus machining for lever sections and openings
Compare forming and machining for the lever section and openings.
Working holes or edges may need finishing while nonfunctional surfaces retain the formed condition.
The proposed route is confirmed for your drawing, material and quantity. An image does not establish a fixed tolerance or a complete process specification.
Compare manufacturing capabilities →Connecting lever material, treated-surface and corrosion requirements
Specify the base material, final condition and corrosion or appearance requirements.
Mark drive, guiding and contact surfaces that must meet their dimensions after treatment.
The component specification does not establish a security rating for the complete lock.
Review material-selection information →Connection fit, spacing and travel-clearance checks
Check connection fits, spacing and clearance throughout the travel.
Approve the lever in the intended mechanical linkage.
Specify the drawing revision and the condition in which each dimension is inspected. Record the agreed dimensional and functional checks before sample approval.
Quality documentation →Where the money goes on a thin connecting lever
A connecting lever is a small part whose cost is set by how hard it is to keep straight and how hard it is to hang on a plating rack. Neither is a volume problem, which is why these parts do not get much cheaper in larger runs.
| Cost element | Why a small order costs more per piece | Why a large order stops getting cheaper |
|---|---|---|
| The forming tool | A thin lever needs a tool with good support at the ends and a controlled gate position, otherwise the part fills unevenly and distorts. | Tooling is recovered quickly. Repair and re-polishing of the tool is the recurring cost, and it scales with the number of strokes rather than falling with them. |
| Straightening after sintering | Thin levers come out of the furnace with a bend. Straightening is done part by part, and how much is needed depends on how the parts sat in the load. | A better load arrangement or a design change that adds stiffness removes the operation. Volume alone does not make straightening cheaper. |
| Choice of process for the blank | Where the section allows it, a stamped blank can be cheaper than a formed one, but thickness and feature depth limit that option. The choice is made once, at quotation. | If stamping is viable, it scales better than forming because the blank is cut from strip in one stroke. That is a process decision, not a discount. |
| Plating rack density | Thin levers hang at low density on a rack to avoid distortion, so a rack carries fewer parts than its area suggests. | Rack density is limited by the part, not the tank. More volume means more racks and more handling. |
| Hole spacing measurement | Hole spacing is quick with a fixture and slow without one. The fixture is a one-off, the measurement is per part. | Once the fixture exists this line is small. It is also the line most often left out of a first quotation and then discovered. |
Note. The split below describes cost structure, not prices. What a specific part costs depends on its geometry, material, finish and the quantity you can commit; this page explains which of those you can move and which you cannot.
The cheapest lever is a slightly stiffer lever. Adding a rib or a small increase in thickness usually removes the straightening step, which is the largest per-part line here. Discounting a part that has to be straightened is difficult; designing one that does not is not.
Prepare a Product-Specific RFQ
- Component definition. Send the 2D drawing and 3D model, where available, with the drawing revision and the requested part or assembly scope.
- Mating information. Include the assembly references needed to define the interfaces discussed above.
- Delivered condition. State material, finishing and inspection requirements, identifying any items that need a manufacturing recommendation.
- Supply plan. Include sample needs, expected order and annual quantities, packaging requirements and target timing.
Product Questions
Is overall lever length the main functional dimension?
Often the connection spacing and contact geometry matter more; dimension the part from its actual mechanism interfaces.
Why prioritize connection spacing over the lever outline?
The linkage acts through its connections, not through an arbitrary exterior dimension. Defining those centers and working contacts establishes how motion is transferred. The surrounding outline can then be controlled according to clearance and appearance rather than assumed to be the main datum.
How should the completed mechanism be checked?
Check connection fits, spacing and clearance throughout the travel. Approve the lever in the intended mechanical linkage.
Technical Context
The product-specific notes above identify drawing-review questions. General process and material references are collected separately; they do not verify a material grade, production qualification or performance claim for the pictured part.
Manufacturing and material references →